How to draw a thumbs up
Table of Contents
Table of Contents
Have you ever wanted to draw a thumbs up but didn’t know where to start? Don’t worry, you’re not alone. Drawing a thumbs up may seem like a simple task, but getting it just right can be a challenge. In this article, we’ll go over the basics of how to draw a thumbs up so that you can impress your friends and family with your artistic skills.
The Struggle of Drawing a Thumbs Up
Have you ever tried to draw a thumbs up, only to end up with something that looks more like a deformed potato? Don’t worry, we’ve all been there. Drawing a thumbs up requires a certain level of skill and precision, and it can be frustrating when you can’t seem to get it right. But with a little bit of practice and the right guidance, you can master the art of drawing a thumbs up.
How to Draw a Thumbs Up
Before we get into the nitty-gritty of drawing a thumbs up, it’s important to understand the basic shape of the hand. The thumb is located on the side of the palm, and it can be moved around to form different shapes. To draw a thumbs up, start by drawing a curved line to represent the palm of the hand. Then, draw a line coming out from the side of the palm for the thumb. Curve the tip of the thumb inward to create the shape of the thumb. Finally, draw a straight line coming out from the top of the palm to represent the rest of the hand.
Now that you have the basic shape of the hand, you can start adding details to make it look more realistic. Add some curves and creases to represent the knuckles and joints in the hand. Then, draw a circle at the tip of the thumb to create the look of a thumb nail. Finally, add some shading to give the hand some depth and dimension.
Summary of How to Draw a Thumbs Up
To draw a thumbs up, start by drawing the basic shape of the hand with a curved line for the palm and a straight line for the rest of the hand. Add a line for the thumb and curve the tip of the thumb inward. Add details like knuckles and joints, a circular thumb nail, and shading to make the hand look more realistic.
Personal Experience Drawing a Thumbs Up
When I first started drawing, I struggled with getting the shape of the thumbs up just right. But with practice and some helpful tutorials, I was able to improve my skills and create drawings that I was proud of. The key is to take your time and be patient with yourself. Drawing is a skill that takes time to develop, but with practice and persistence, anyone can learn how to draw a thumbs up.
Tips for Drawing a Thumbs Up
Here are a few tips to keep in mind when you’re drawing a thumbs up:
- Start with the basic shape of the hand and build from there.
- Pay attention to the proportions of the hand and the size of the thumb.
- Add details like knuckles, joints, and shading to make the hand look more realistic.
- Take your time and be patient with yourself.
Practice Makes Perfect
The more you practice drawing a thumbs up, the better you’ll get at it. Experiment with different angles and positions to see what works best for you. Don’t be afraid to make mistakes - they’re a natural part of the learning process. With practice and determination, you can master the art of drawing a thumbs up.
Question and Answer
Q: What are some common mistakes people make when drawing a thumbs up?
A: One of the most common mistakes people make is drawing the thumb too big or too small in relation to the rest of the hand. Another mistake is not paying attention to the angle of the thumb - it should be pointing straight up, not to the side or at an angle.
Q: Do I need any special materials to draw a thumbs up?
A: No, you don’t need anything fancy to draw a thumbs up. All you need is a piece of paper and a pencil.
Q: I’m having trouble getting the shading on my hand to look right. Any tips?
A: Shading can be tricky, but one tip is to pay attention to the light source in your drawing. The areas of the hand that are facing the light should be lighter, while the areas that are in shadow should be darker.
Q: How long does it take to learn how to draw a thumbs up?
A: Learning to draw a thumbs up can vary from person to person. Some people may pick it up quickly, while others may need more time and practice. The key is to be patient with yourself and not give up.
Conclusion of How to Draw a Thumbs Up
Drawing a thumbs up may seem daunting at first, but with the right guidance, anyone can learn how to do it. By following the basic steps outlined in this article and practicing regularly, you can master the art of drawing a thumbs up. Remember, the key is to take your time, be patient with yourself, and most importantly, have fun!
Gallery
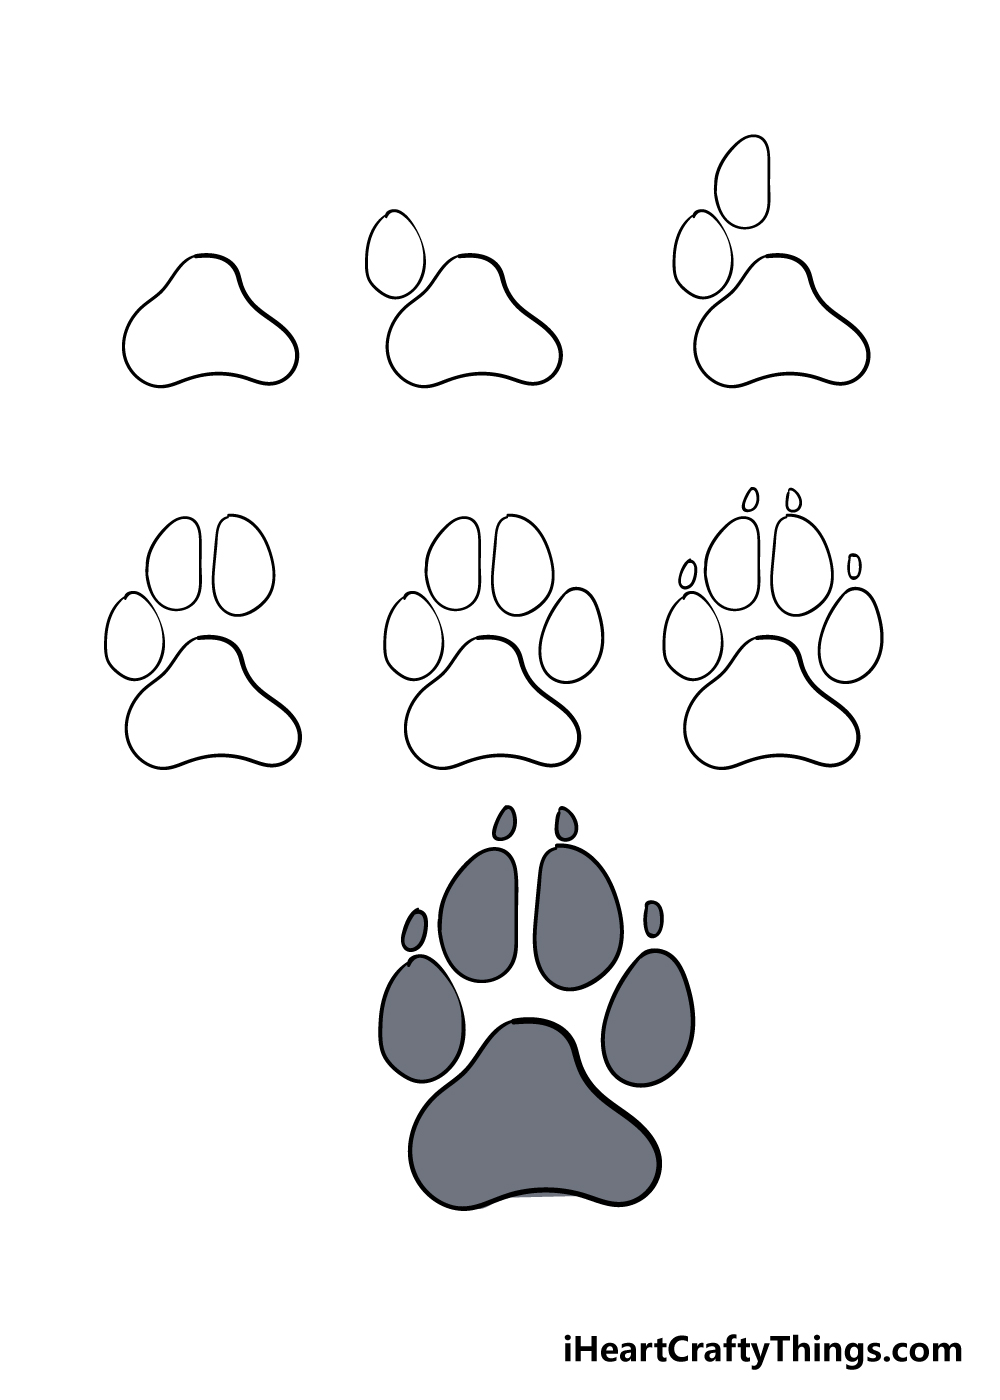
Thumbs Up Drawing - How To Draw A Thumbs Up Step By Step

Photo Credit by: bing.com / iheartcraftythings
How To Draw A Thumbs Up Sign - Really Easy Drawing Tutorial

Photo Credit by: bing.com / thumbs draw sign drawing easy
Simple Thumbs Up Draw , Free Transparent Clipart - ClipartKey

Photo Credit by: bing.com / clipartkey
How To Draw A Thumbs Up - Step By Step Easy Drawing Guides - Drawing Howtos

Photo Credit by: bing.com /
How To Draw A Thumbs Up Sign - Really Easy Drawing Tutorial

Photo Credit by: bing.com / thumbs draw sign drawing tutorial easy complete